Simple Way To Batch Add Tags to Your Infusionsoft App

A client recently asked about having us create a batch tag creation tool. There are a couple of them out there in the market and some are even paid tools. But the fact is, you simply don't need it. Read this short article and you'll learn how you can create any number of tags – dozens or even hundreds – in one fell swoop with a CSV template file.
If you do work for clients or if you run a service where you have multiple clients using or licensing access to your app, you may have come across the need to be able to create a lot of tags all at once using your own specific naming convention. Or maybe you are setting up a brand new app and want to create all of your tags in one fell swoop. Perhaps you have a campaign that you use over and over again but with different tags for each version?
The bottom line is that there are many reasons why you might need to create a whole bunch of new tags all at once and not wish to manually have to enter them in, one by one (oh what a bore)! Well, read on, because I'm going to show you two methods for rapid tag creation.
Method #1 – Quick Entry
So many of you likely already know this method, but when I train on Infusionsoft, I'm always amazed by how many have never heard of it. If you've already seen this, don't worry, the next method is even sexier!
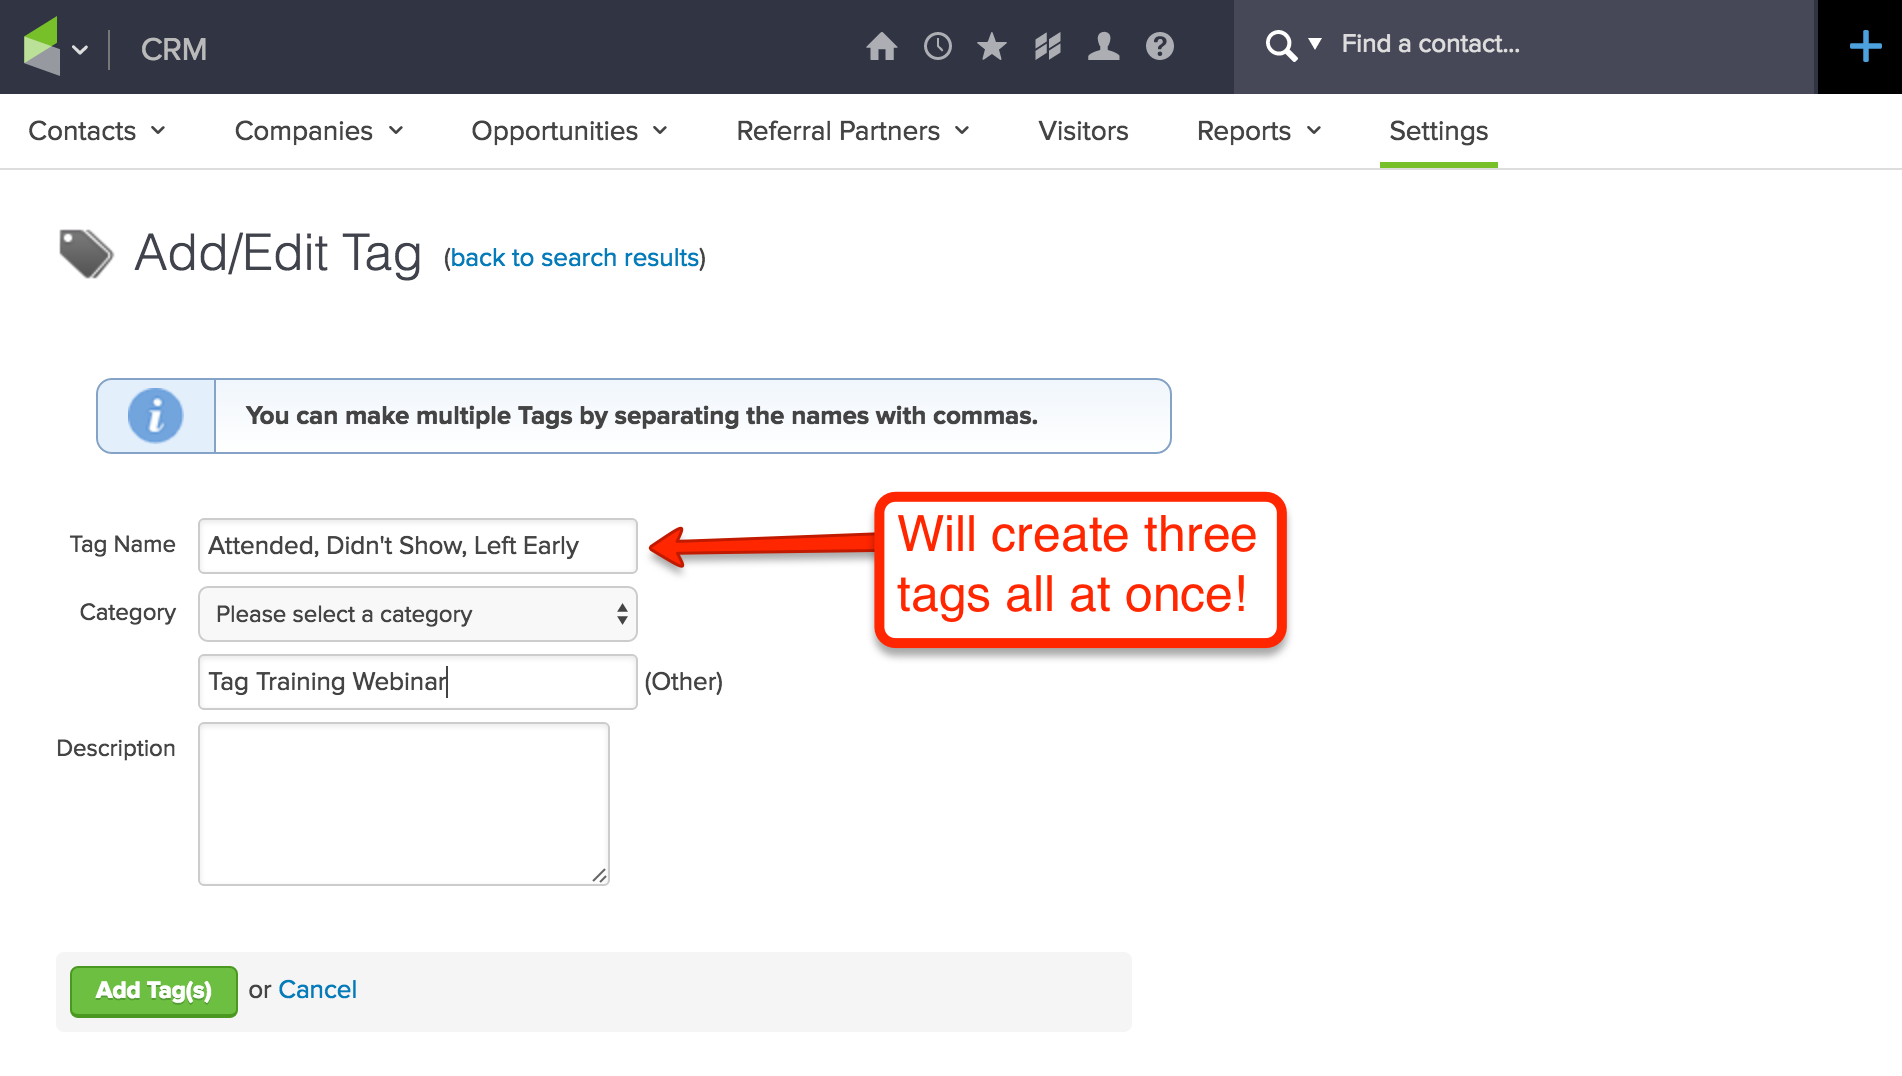
The first trick is that when you go to add a tag, you can separate the tag name with a comma and it will automatically create multiple tags in the same category that you choose. This is very useful when you just need to create a handful of tags and they're all going into the same category.
In the image below, you'll see an example for creating three tags for a training webinar. By separating them with a comma, Infusionsoft recognizes that you want to create multiple tags and processes all three when you click the Add Tag(s) button. If you had really being paying close attention, you would have noticed that this button said Tag(s) and not Tag. So the interface was giving you a “hint” that you could create multiple at once.
NOTE: This does NOT work when you edit a tag. If you edit a tag, the system assumes (rightfully) that you're only editing that single tag. So adding a comma to the name while editing a single tag will NOT result in multiple tags being created.
Method #2 – Sexy Batch Add with a CSV File
So what if you have dozens or even hundreds of tags to add all at once? Well, a little known and rarely used option of Infusionsoft let's you do exactly that. This is especially useful if you manage client accounts and have your own tagging methodology and want to create your standard set of tags and tag categories all at once.
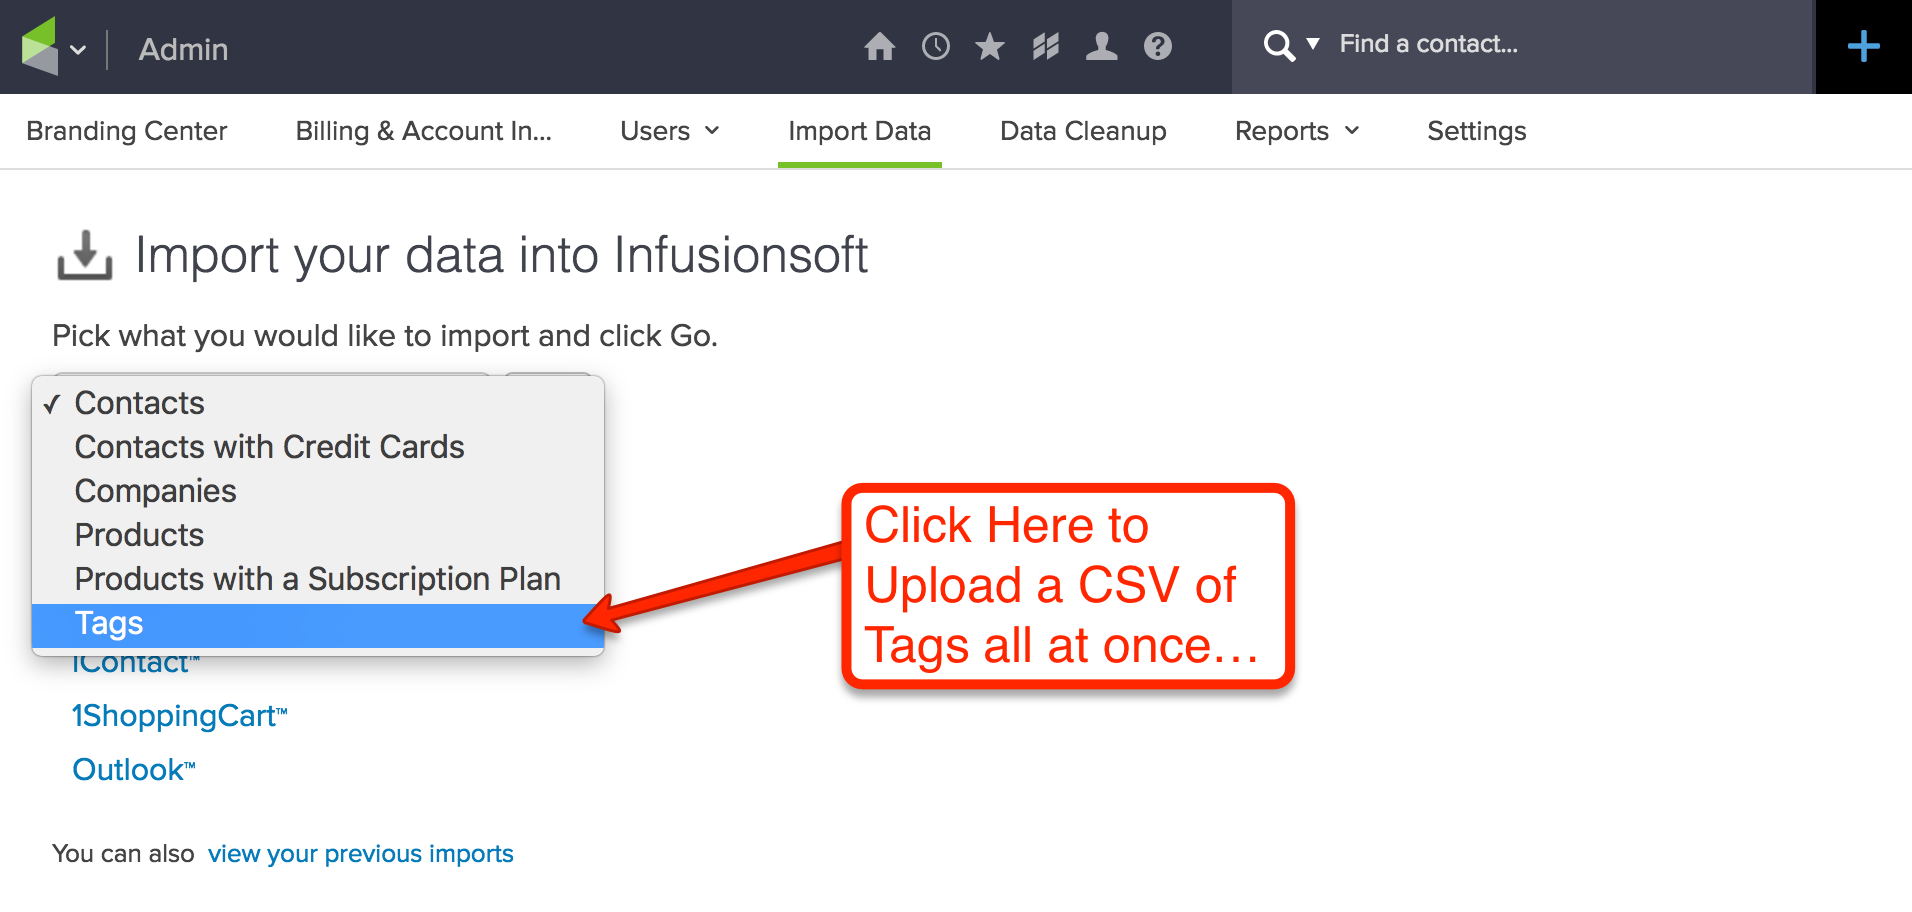
To access this option, goto the Admin -> Import Data menu. Once there, click on the dropdown and select Tags. The screen should look like this:
After you do, you'll be give the option of downloading a sample import file. It's not terribly helpful, but if you want to, go for it. This is such a simple file to create, there's really no need. Also, the sample file (at the time of this blog post) only contains two columns:
- Tag Name
- Category
While that is what most people will want, it's important to note that you do have the ability to also import:
- Tag ID
- Description
Now there are some special cases where the Tag ID is useful, but the Description is much more so. After auditing 100's of apps, I can tell you, the number of people that take the time to add descriptions to their tags is quite low – probably less than 3%. However, I can also tell you that it is a very good indicator of someone that will have a very well-structured and organized Infusionsoft app.
I know, I know… you're saying, “Troy, those people are just obsessive” – and you may be right. But the more organized and self-documenting your campaigns and tags are, the less bugs you'll have and the less you'll pay when (if) you hire a consultant to do any work in your app. So it's definitely a Best Practice that I would recommend.
Building the CSV file is super easy. You can use your tool of choice – Numbers (Mac), Excel (on Mac or PC), or online via Google Sheets. Heck, if you're a gluten for punishment, you can even do it with a simple text editor – YUCK!
I would recommend that you use the following columns:
- Tag Name
- Description
- Category
Add in all of the tags you like into the file as well as their descriptions and category. This is much easier to do in a grid entry format that a spreadsheet has than it is inside the Infusionsoft interface. Then, simply save the file as a CSV text file and you'll be all set.
Then just browse to the saved CSV file and upload it into Infusionsoft. Infusionsoft will then load your file and take you to a screen where you can map the fields in the CSV file to the Infusionsoft fields. Here's an example of what that will look like:
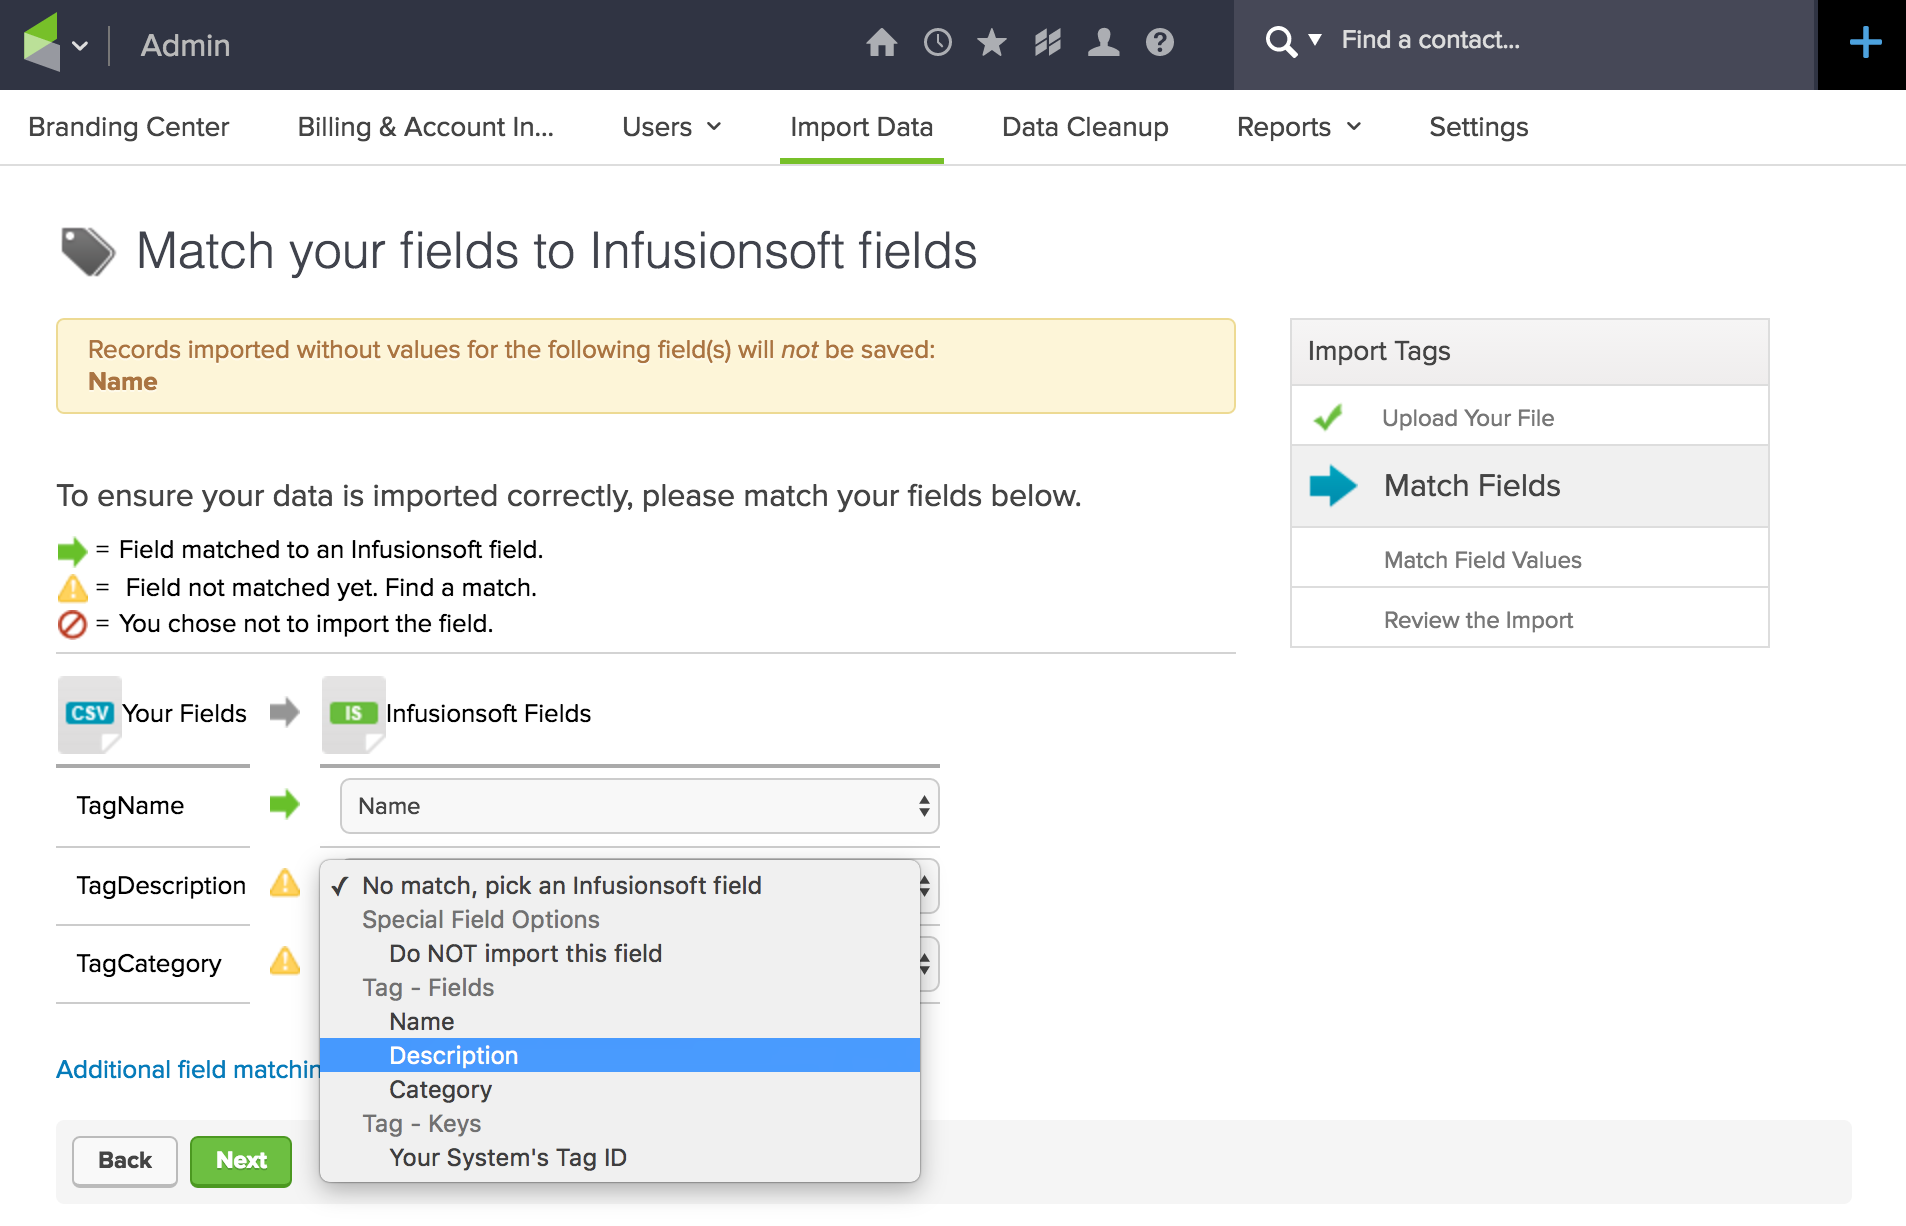
Just complete the simple three column mapping and click the Next button. On the next screen Infusionsoft will show you a preview of the data just so you can double check it and see what's really coming in and make sure there are no surprises. Then you simply click the green Done button and you'll be all set.
Yes, I know it seems like there are a few steps here, but really it's quite simple. Create a 3-column CSV file and upload it – that's really about all there is to it!
Power Tip
If you're doing this a lot, the real trick is to get your CSV file laid out and just save it as a template. If you have multiple different groups of tags that you regularly import, well, just create multiple CSV template files. Now, whenever you need to create them, it will literally take you only two minutes to upload the file, map the fields and click Done!
Pretty cool, huh? Enjoy!
If you're not already on our list to receive tips like this one, make sure and signup below.