Assign It Helper
Auto assign your sales reps based on contact location information!


Overview
The Assign It Helper is very powerful and uses Google's distancing api to assign contacts to a sales rep based upon distance or travel time. It compares the addresses and uses the same api that Google uses for it's GPS values.
When calculating the distance or the travel time, it even allows you to specify the mode of travel, be it by car, walking, by bicycle or even by public transportation (heaven forbid)!
We created this Helper for a client who uses various bike delivery stations throughout the city and needed a way of automatically determining which station was nearest to the customer. Pretty slick, huh?
Highlighted Features
- Assign By Proximity or Travel Time
- Assign Only To Specific Teams
- Adress Fallback Option
- Walking, Bicycle, Public Transport or Driving Modes of Travel
- Multiple Addresses Available
Assign By Proximity or Travel Time
When determining where to assign the contact, we can look at the proximity or the travel time - either one, you choose.
Assign Only To Specific Teams
If you only want to assign to a certain team of sales reps, you can select the one you want. Or you can just select to the closest one across all teams - your choice.
Adress Fallback Option
Address Fallback allows you to first check the billing address, then the shipping, then the third optional address automatically (in that order) if you want. This is an option, however, and you can turn it on or off.
Walking, Bicycle, Public Transport or Driving Modes of Travel
We allow you to pick any of the four modes of travel - walking, driving, public transportation or by bicycle.
Multiple Addresses Available
If you want to assign based upon a single, specific address for your contact - billing, shipping or address 3 - you can specify it.
The Toolbar
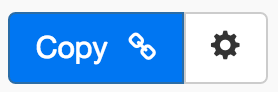
Above is the toolbar options you'll see for the Assign It Helper. Here are the Toolbar button options from left to right:
- Copy Link for Infusionsoft - This first blue copy link button copy the URL used for the http post snippet inside of the Infusionsoft Campaign Builder.
- Configure Button - The last button on the far right is the start configuration button which allows you to View, Edit, Copy, Delete, view the Usage Report and the Usage Log.
Tips, Tricks and Shortcuts
None, currently.
Video Transcript
Hello and welcome to MyFusion Helper. My name is Troy Broussard and I’m going to show you in this brief video how to work with the Assign It Helper. The Assign It Helper is a great tool that we developed for a client that needed to be able to assign contacts to one of his sales reps based on geographical location. This is unlike anything else you'll see out there that's not using zip code and things to that nature, but actually using the Google Distance API for time of travel and distance calculations. It's a very powerful little helper.
I'm going to show you how it works, how to configure it inside the application, and then I'm also going to show you inside of Infusionsoft, how you would connect it up and make it work there. Then lastly, we'll come back and wrap it up with just a talk of some best case use scenarios and things that other clients are using it for in their businesses to see if that helps you in yours.
Let's dive right in and take a look at how to set it up inside of the app. Here we are logged into the app and we can click on the green button here, to create a new helper. You can type it in or select it from the dropdown. It's here at the top. I've got it selected and I've got a name here typed in for it. I'm going to go ahead and hit "configure your helper". That's going to go ahead and create it, and bring up the screen that we fill out. There's a lot of options here but it's fairly straightforward.
The purpose of this helper is to be able to assign contacts to a particular sales rep. How you use that relationship is entirely up to you. It may be the sales rep for their regional area. You may not be using necessarily as a sales rep.
Maybe you're using it more as a support or service side. But that's the intent of how it works. What it's going to do is use travel time or distance to their address and between the sales rep to determine the closest one to assign to them. When we look at this, there's a couple of different options we can choose.
The first thing we can do is we can choose to assign based on shortest travel time or we can assign based on closest proximity. This is distance and this is time. Usually they're going to be very similar but you have the option of specifying which makes most sense to you.
When you talk about time, you have to talk about the mode of travel. This is really interesting. A lot of people just assume that it's driving and are kind of surprised to see that we have these other options. The reason is, the very first client that we created this application for had a bike delivery company and they needed cycling transit.
On bicycle, how long was this client away because they had multiple service locations in a geographical area and they needed to find the closest person to assign to them for their bike delivery routes. These can be used very creatively. It defaults to driving but you also have the ability of selecting walking, traveling by bicycle, or taking public transit. More than likely you'll probably use driving but those are the reasons for some of the other options that we have there.
Lastly, you can assign it to a team of users as well. You can use the team feature and have it route through that, or not. You can select "yes" and select the team that you want to send it to, like this. Or you can say "no" and not do that. It's up to you. Then we select how you want to look up the address for the contact. We could go off the billing address, the shipping address, or the optional address, however you'd like.
We also give you the ability to have a fallback address. Maybe you want to go to their billing address by default but you also want to use the shipping address as a backup in case they don't have a billing address. That's what that would be for. Given that information is all you would have to do to set this helper up. How do we want to assign, how are we traveling, a team or an individual, and then the address information. Then we go ahead and hit "create helper".
Now that we've created the helper we just click on the great big blue button here, to copy the link, to paste that into Infusionsoft. Now, when we take a look at how to implement that in Infusionsoft, I've got a little campaign here. We're going to assume that you have a service that somebody just registers for from a website and then after they register for that service. Maybe they had already purchased it and they get sent to this registration page, which is a web form. They fill out their information and then you want to be able to assign them to the right sales rep for follow-up. The way you would do that is, we need to make the API call.
We're going to go in here into the sequence and then we're going to scroll down to the process section and go all the way down to the bottom. You'll see the "send http post" which, is our API integration. What I like to do is always name this MyFusion Helper and then I give it the type that we're doing. This is an Assign It. That's the way I tend to do it, but you can put whatever description there that you like.
Then we paste in that ID right here and we send it to "ready". Notice, that you don't have to configure any of these contacts or any of that. That gets handled automatically. You just paste in the URL and you are set. At that point, it's all set up here. Of course, we would have turned that sequence on and all that good stuff and then you're free to do whatever marketing and routing on the backside of this that you need to do. That's how quick and easy it is to deploy.
One other thing I wanted to show you is, notice that when you have these big, long links here, that you can also look them up in MyFusion Helper. If you're inside of a campaign that you've got some stuff with and you are not sure where that's set up inside of MyFusion Helper. Let's say you've got this one and you're like, "I know it's here but I don't know where it is inside of the helper". You can copy that and then you can come in here and paste it in, like that, and it will filter and find it for you automatically. This is just a neat little trick that a lot of people aren't aware of so, I want to take a second and show you that.
Let's talk about a couple of different examples of where this might make sense for you. One of them is for local delivery and service companies. If you have multiple locations and you're serving a Chicagoland area and you've got 12 different small store fronts inside of Chicago area and you service that geographical location, then this can be a great type of solution for you using the Assign It Helper. Another option that we see a lot is larger district or regional sales organizations that have teams that are geographically distributed.
They require some travel and visitation and so, you don't necessarily want to go by zip code because in the past that's the way people have done it. But the reality is that, the zip code doesn't tell you much in terms of geographic location. Being able to use the Assign It Helper and spread out and assign your sales and service team based on actual travel time will help you save money in your business for sure. Those are just a couple of the examples and I'm sure there's a lot of other use cases that you can come up with. But hopefully, that will help you get kick started in your business. If you have any questions, hit us at the Helpdesk at help@myfusionsolutions.com.