Route It Helper
Route to custom web pages based on contact information, automating your workflow.


Overview
Campaign Builder is very powerful, but one thing that it lacks is the ability to dynamically route people to the right URL, webpage, or webform thankyou page based upon their unique situation. We fix that.
Other competitors allow for smart dynamic links that are tag based, and our Route It Helper also allows for tag based routing - but we don't stop there. We also allow you to dynamically route someone based upon field conditions as well as order history. This opens up all kinds of additional possibilities.
Highlighted Features
- Uses Tags, Fields or Order History
- Passes Through Any URL Parameters
- Multiple Destinations
- Allows for a Fall Back Destination
Uses Tags, Fields or Order History
When you setup your logic for where to go, we allow you to add conditions that are controlled by Tag logic, Field logic or Order History. This gives you maximum flexibility in creating super powerful and highly adaptable logic.
Passes Through Any URL Parameters
We automatically pass through any parameters that are sent to the Route It Helper. This is critical if you're using the Route It Helper in the middle of a complex sales funnel with 1-click upsells, for example. No need to set anything up, we pass through all parameters automatically.
Multiple Destinations
You can setup multiple different routing destinations and rules and you can even mix and match the rules. One rule could be based upon tags and the other based upon field logic, for example. It's completely up to you. The order of the rules is the order that we will evaluate them though, so make sure to take that into account.
Allows for a Fall Back Destination
Lastly, we allow you to specify a fallback or default URL to go to in case none of the rules are satisfied.
The Toolbar
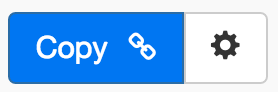
Above is the toolbar options you'll see for the Route It (Smart Links) Helper. Here are the Toolbar button options from left to right:
- Copy Link for Infusionsoft - This first blue copy link button copy the URL used for the http post snippet inside of the Infusionsoft Campaign Builder.
- Configure Button - The last button on the far right is the start configuration button which allows you to View, Edit, Copy, Delete, view the Usage Report and the Usage Log.
Tips, Tricks and Shortcuts
None, currently.
Video Transcript
Hello, and welcome to MyFusion Helper. My name is Troy Broussard. In this quick video I’m going to show you how the Route It or Smart Link feature works inside of MyFusion Helper. I’m going to start out by just kind of going through the how it works and how to configure it and how to set it up. So, we’re going to go through that in the utility and a live demo. After that, we’re going to dive into the Infusionsoft side and I’ll show you how to deploy it in Infusionsoft and use it properly. Then we’ll come back and we’ll talk about some different use cases for how to get the most out of it and some of the best cases for practicality of using it in your business.
So, let’s jump right in and take a look at how to set it up first. Okay. So, we’ve already logged into MyFusion Solutions and we have it here on the screen. What we’ll do is we’ll go create a helper. We’re going to create a Route It Helper, Smart Redirects, whatever way you want to call it. It’s doing both of those features. We’ll just call this Routing Test and go ahead and configure that. I’ve got one already active and deployed and we’re going to use that in the sample that I’m going to show you, but I want to just walk you through the process so you understand how to use this properly.
First of all, this is one of our favorite and most powerful helpers in the application. This is probably in the top three in terms of usage and popularity. Everybody loves this because there’s so much power to it. People like to call it dynamic thank you pages. That’s part of what it really does, but that’s kind of oversimplifying it. There’s so much that you can do with it, but at the end of the day that is what we do. We’re allowing you to instead of send a person to one fixed path or one fixed thank you page from your web forms in Infusionsoft or from your order forms or anywhere else, we’re allowing you instead to use dynamic logic inside of Infusionsoft to route them on to multiple possible locations based on a set a criteria.
So, let’s dive into that. We can set the criteria in a few different ways. Now, we allow you to choose tags. We also allow you to use fields and we also allow you to use orders. So, the reason for these different distinctions is there’s some really powerful things that we can do when we move this just beyond tags. By allowing you to choose fields, we can do things off of date criterias which will allow some really interesting stuff that I’ll walk through here in some examples. Then by being able to pull in order history you may want to look for specific order history to route them based upon that as well. So, we give you all three options that’s really up to you.
Now if we start out here with tags, we can select whether the tag is present or not, or whether the tag was applied within a certain window of time, or outside of a certain window of time. This gives you a lot of flexibility in terms of how to use those tags not just whether they have the tag or not but actually the timeframe that it was applied. So, you can select the tag and then we go in and set the value and the URL.
Now, if this is tag is present, the value is just true or false and then the URL is where we want to send them. So, for example, maybe I want to send them to www.Yahoo.com or something like that, right? But of course that’s not where I’m going to send them. I’m going to send them some type of an offer, but if they have a specific tag here that is of interest to us, let’s say they’re a dentist then we want to send them to one landing page, and if they’re a hygienist we want to send them to another, for example. That would be a possibility here where based on their avatar type we could send them to a different specific landing page. Okay?
Now the part to understand about the interface is that you can add multiple criteria. So, I can come on here and do the same thing here and say tags present and I did the hygienist so let’s go there and so this one could be for the dentist then we’d send them to a different URL.
Now lastly, we have this fall back URL down here at the bottom. Now if the contact passes through both of these tests that we put in place here and they don’t fit into either one of these criteria, then they’re going to go to the third URL which is the fall back URL. Okay? So, think of this as two different divisions and branches we could send them to based on these conditions, but we still have to send them somewhere if they don’t fall into any one of these two conditions. Okay?
So, many people only use one condition, sometimes you may have five or six here. It’s really up to you. Now one of the common questions that we get is what happens if this person I’m doing a tag split like this and they have both tags, what’s going to happen? What is the system going to do? Well, in that case the system is going to send it to the first match that it finds. So, if this person was tagged inappropriately and is tagged as both a hygienist and a dentist which they can’t be both, right, they’re one or the other, but if they were tagged as both of those then the tag is present for the hygienist so it would match that and it would send them to the URL we had specified here and it would never check this other one. Okay? So, just understand that these do have an order of precedence that has an impact as well. Now you can create multiple criteria here as much as you want or just have a single criteria and the fall back. It’s totally up to you.
Now one of the other things to keep in mind is going off of fields. When we go off of a field you have the ability to go off of numeric fields or you can also go off of date fields. Now the date field is very, very powerful especially when you’re doing any type of consultative type business where it’s based upon talking to people in person and you can see if you have an appointment date field and you can say if I’ve talked to them within the last thirty days then send them to this URL. If I haven’t talked to them in the last thirty days then send them to this other landing page, right?
So, we can use those date fields to give a lot of different options here within the past or within the next or last X amount of days or if it’s in the past or if they have an appointment marked in the future or if they had one in the past, right? We can do all kinds of different criteria here around dates. We can also do criteria around numeric fields and choose that appropriately. So, those are another core set of options that you can do that are field based.
Then the last option here that we can choose from is you can go off of orders. You can set some criteria and then look at their last order and whatever the invoice total is greater than a certain value you could send them here. So, let’s say you want to segment based on their most recent purchase and people that have bought at a certain threshold you want to make a conditionally different offer because they have a higher spending threshold then somebody else. This gives you the ability to use that order history as well, and then once again still have a fall back. So, the best practice here is to divide these up and create the different segments that you need but then have a generic catch all segment for any of those that slip through. Okay?
So, now what I’m going to do is I’m now going to create this. I’m going to go back and show you the one that I did create and the one that is already deployed that I’m going to show you the test on. So, you can see this one it’s run a few times here and we can go in and view this and I want to just kind of show you how the test is set up so that you can see it working real time.
In this particular one I’m using some tags and if they’ve got the tags set I sent them to Yahoo, if they’ve got the other tag set I send them to Bing, and if they don’t have any tags I send them to Google. Okay? So, very simple based on a presence of two tags.
So, let’s go into Infusionsoft now and show you how that works. Okay. So, here we are inside Infusionsoft. You can see that this is a very simple sequence. There’s nothing in it. I’m just trying to show you how this functions and not cloud you down with all kinds of other ancillary stuff. So, what we’re really showing you is how to do a dynamic redirect. The way this works is that inside of the helper when we copy the URL, so when we come back here and look at the list of helpers and we copy that link, okay?
Then inside of here we paste that link in and the one thing that we want to make sure that we do is that we pass the contact’s information to the thank you page. Okay? This is imperative. If you don’t click this little checkbox this will not work properly, so please. Let me repeat that. You’re going to paste it in and then you have to check this pass the contact’s information. What that does is it tells us who the person is and so then we can go and look up their tags and tie it in and do the redirects appropriately based on that logic. Okay?
So, that’s all there is to configuring this. Now you could also put this on an order form thank you page or a landing page thank you page, anywhere that you can use a thank you page link you can do that. You just have to make sure and pass in the information.
Now the logic we set up and I showed you is either going to go to Yahoo or Bing or Google as a default. So, if we go run this. Here’s the form and we run this for my email address. We just pull up and show you first of all. So, here if I hit refresh and we take a look at this email in here. It has no tags assigned to it. So, this would be the default situation right now. So, if I come in here and run it for the default, you’re going to see it’s going to redirect and it’s going to go to the default, Google. Okay?
Now, I’m going to go rerun the test again, but first I’m going to apply a tag. So, we’re going to come in here and we’re going to apply the route test “A” tag. Okay? Now on this condition and then we’re going to rerun it. So, now the person falls into a different bucket because they have that tag applied and so we can rerun the test and now you’ll see it redirects him onto Yahoo. Okay? Again, I know Yahoo and Google and Bing aren’t where you’re sending people but it’s just to illustrate the dynamic nature of it.
Okay. Now what I’m going to do is I’m going to delete “A” and I’m going to add “B” instead. Because remember if it’s got both of them it, satisfies both of them it’s always going to go to the top one. Okay? So, I’m going to add route “B” to the option now and that’s what tag I now have. I’m going to rerun this same test again. I can go in here and rerun it. Now it’s going to route and it’s going to send me to Bing. Okay?
So, as you can see this is really dynamic and powerful. Obviously you’re going to send them to more creative and useful pages then search engines, but if you can just follow the logic here of being able to just with a simple tag or with more advanced features, like dates and times to be able to send people anywhere they want or based upon the presence of certain fields or order history you can see that the smart redirect links are very powerful in deed.
So, I wanted to show you one other way that you can use the route it. This is yet another example of how to do dynamic linking. So, we’ve talked about using it on thank you pages and order forms, and I showed that on a previous example. In this example I want to show you how to do this properly from an email.
Now you can send out any link via email and have that be a smart link as well, so have it dynamically route based on that various criteria. So, there is a couple little tricks here that we’ve got to make sure. Now on the previous example I showed you how to check the box to pass the contact id. Well when you’re sending this in an email link you don’t have that option. So, it’s important that we build the link properly here.
So, let me show you how to do this. First of all, what we recommend is that you use a campaign link here. So, a campaign and links, and you can just give it any name here. This is going to be the name that you’ll see inside the email, I’ll show you that in a second. This you’ll simply paste in the URL. Now I’m going to edit this here so that we can see it.
We’re going to show this syntax because this is the important part. So, let me highlight this syntax. This is what is absolutely critical. You must have this exact syntax. It is case sensitive. So, you must capitalize the letters properly. You start it with a question mark and then it says contact Id, but the I is capitalized. So, all together, contact Id with a capital I, equals -- with no spaces here anywhere – equals and then the tilde sign, then Contact with a capital C, a period, a capital I, a lowercase d, and then another tilde. Okay? This is absolutely critical and I highly recommend that you test these links out before you send your email so that you make sure it’s working properly. I’ve seen numerous people that make little minor errors, like having a contact lowercase I instead of an uppercase, having a space in here, having a space in between here, anything like that is very likely to break this. So, this is very sensitive and I highly recommend you test it a couple of times. Okay?
Now, you could also do this inside the email. So, let me show you here, but I don’t recommend it. The reason is that we’ve seen certain scenarios where it’s not parched properly inside the email. So, I’ve got just a simple little email here and I can double click on the link and you can see that I’m using a campaign link instead of web address, a campaign link. It will just show me that list of links that I’ve set up. This is the preferred and recommended way to use it. If you just paste it in as a web address here, you may cause things to break occasionally and I just don’t like using that method. It’s more problematic. So, the supported way, the recommended way is using it with a campaign link.
So, now let me show you how this is working. This is just checking for a tag. This tag id, one fifty-one, which is whether they’re a customer of the product. If they’re a customer of MyFusion Helper it’s going to send them to www.myfusionhelper.com. If they’re not, it’s going to send them to Google. Okay?
So, we can kind of take a look at here and this one has got the customer tag, so I’m going to go ahead and remove that. So, there’s no customer tag on it now. If we go into the email that I’ve already sent to myself here, just to speed things along in this tutorial. You’ll see that it goes onto Google.
Now if I come back here to this contact and we go ahead and add in customer tag. So, we’ll add as a customer of MyFusion Helper. Go ahead and do that and switch back in here again and re-click that link then it’s now going to go to MyFusion Helper and you see that. Now what’s really neat about this demo that you see is the email is already sitting in my inbox, right? I’m not having to resend the email. It’s just sitting here. Based on that tag being there or not being there, let’s go ahead and remove it again. So, now it’s removed and now I can re-execute this again and you’ll see it’ll go back to Google.
So, the beauty of this is that the logic is real time updated because it’s checking for that existence of that tag real time when they click. So, it doesn’t matter that the emails already sitting in their inbox. Okay? So, this is just another example to show you how you can use the route it in your business.
All right so let’s jump back in here and just talk about some of the examples and how you can use these in best practices. Now the first most common uses are with upsells and being able to conditionally offer upsells based upon purchase history. Understanding what somebody has bought recently and then offering them a different upsell path is very, very important to converting people at a higher level. If they’ve already bought the product that you’re offering, then why would you offer it to them again? It just doesn’t make any sense. So, having smart upsells based upon purchase history is one very good use case for these helpers.
Now a second is doing the upsells but this time being conditional upon tags or interests. So, maybe you have your list segment very well and articulated various different interests types and depending on what they’re interest type is, you may want to offer them a YouTube training as opposed to a Facebook training, based on whether or not they showed more interest in YouTube or Facebook, as an example. Right? Well, you could use interest based tagging to then dynamically offer an upsell as well.
Now it doesn’t just work with upsells though. These smart links and events can work off of date field logic as well. I showed you that how you could select a field option and look at a special event, whether they attended an event in the last X amount of period of time, or something like that. So, if you run either live online virtual events or if you run in person events or seminars, being able to dynamically adjust your message based on somebody’s attendance record or their registration for a future event or something to that logic. There’s a lot of possibilities there as well. Okay?
So, hopefully this has given you a few ideas and things that you can use this for in your business and I hope you enjoyed this brief video. As always, reach out on the help desk, at help@myfusionsolutions.com, if you need any help.