Law #3 of Effective Campaign Building

Keeping Your Campaigns Clean & Well-Structured
One of the curses of Infusionsoft is actually the beauty as well – the blank canvas of a new campaign. I say that it's a curse because when you are first starting with Infusionsoft it can be very intimating to have to start from scratch. But it's also the beauty of Campaign Builder – you can create just about anything you want with very few limitations.
The grid based canvas, however, offers very little structure on how to organize your campaigns so that they are logical and easy to follow. After doing this for several years now, I've come up with my own system for how to create clean and easy to follow. I'm not saying that you have to do it this way, but if you're struggling to keep things clean, I think you'll find comfort in the logic.
First though, they say a picture is worth a thousand words, so let's show a couple of them.
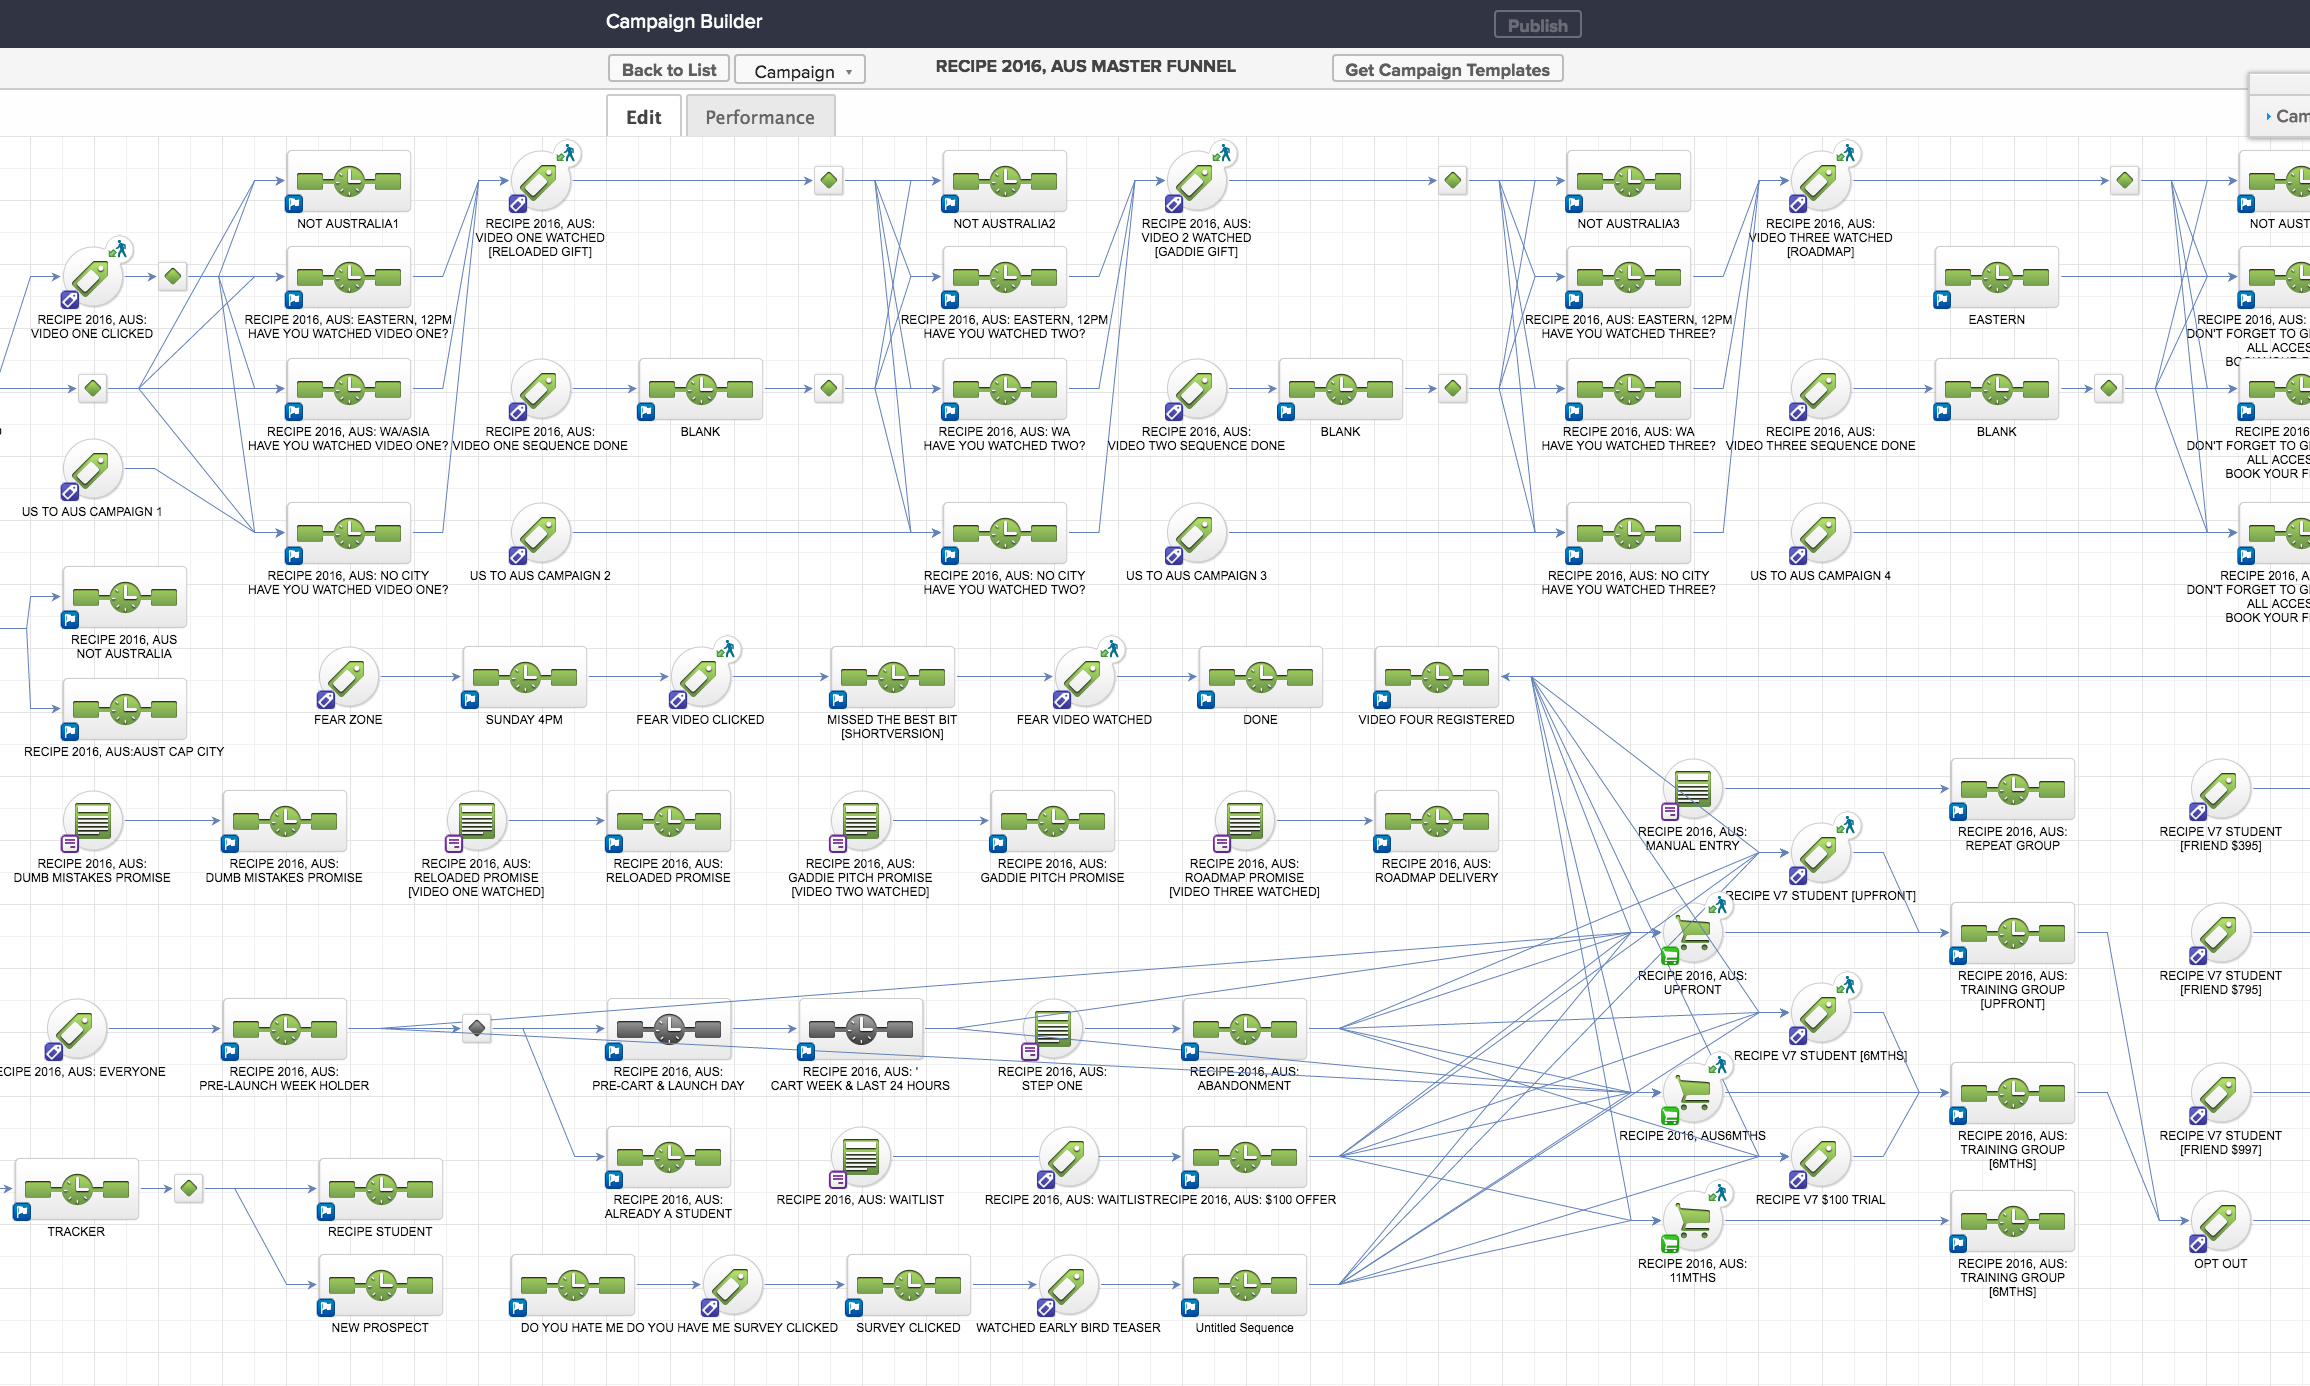
Here's a picture of a common campaign layout that I frequently encounter when working with clients. You'll see that it's very cluttered, unorganized and tough to follow the logic.
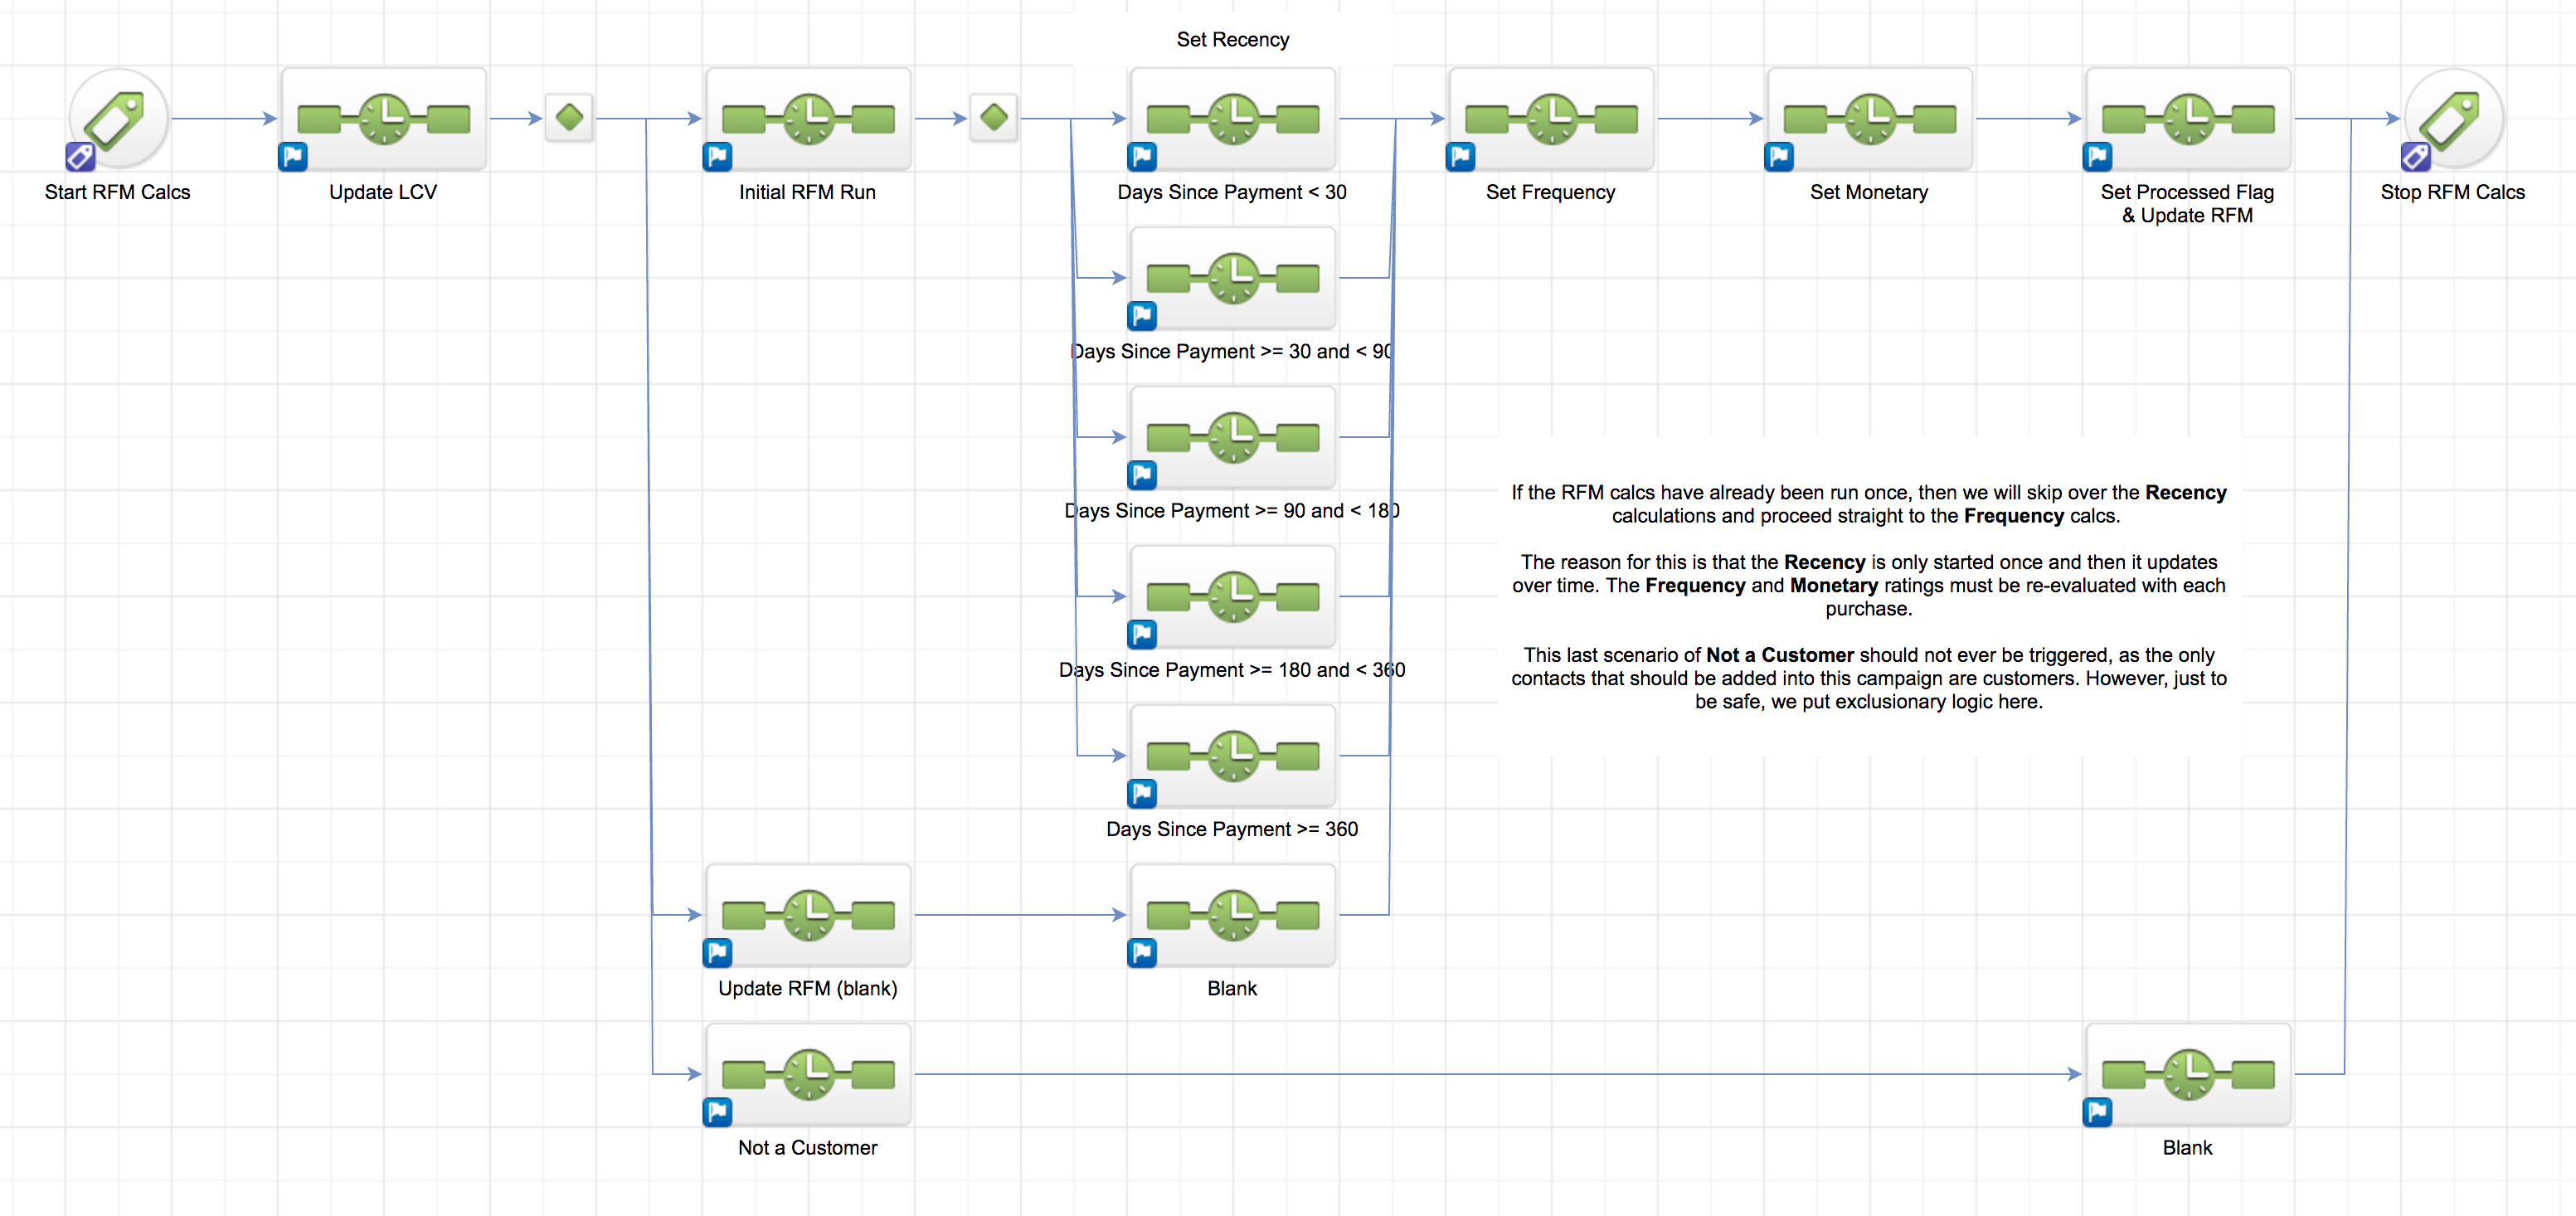
Now, for comparison purposes, here's a screenshot of one of my RFM (Recency-Frequency-Monetary) campaigns for you to see how much more logical and clear the structure of the campaign is.
There are a some rigid but simple guidelines that I adhere to in order to keep my campaigns well-structured, logical and easy to follow. They're not that hard to follow and I believe that when you implement them, you'll find that your campaigns are much easier to work with.
The Simple Rules For Campaign Layout
#1 – Left to Right layout
Start with one or more goals on the left, end with one or more goals on the right. Obviously this is created for Western culture, but we're used to reading from left to right, so keep your campaigns structured this same way. It also means that you align all of your starting goals and align all of your ending goals vertically. There are no tag goals starting in the middle of the campaign, etc.
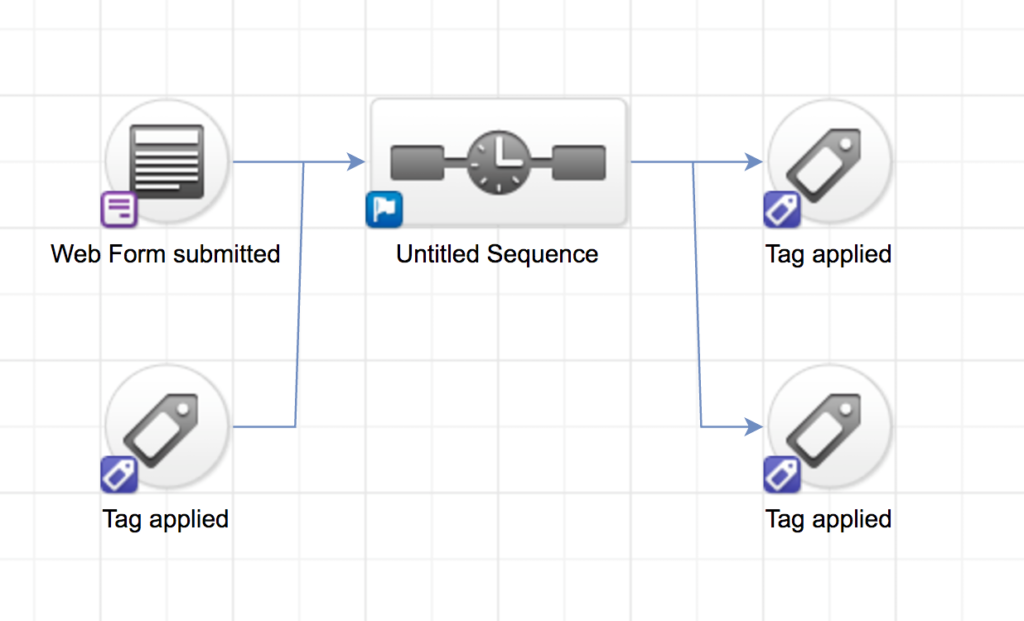
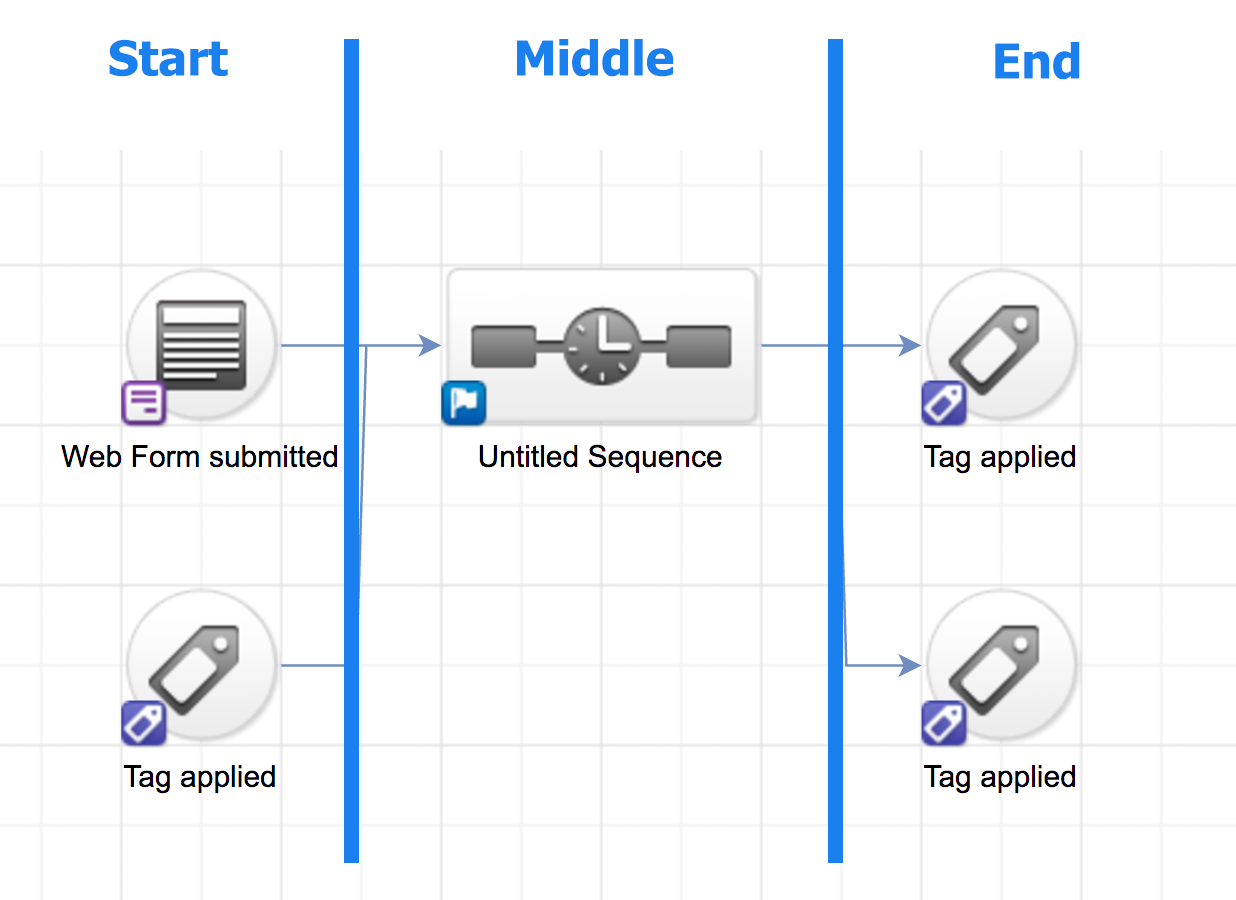
Do this:
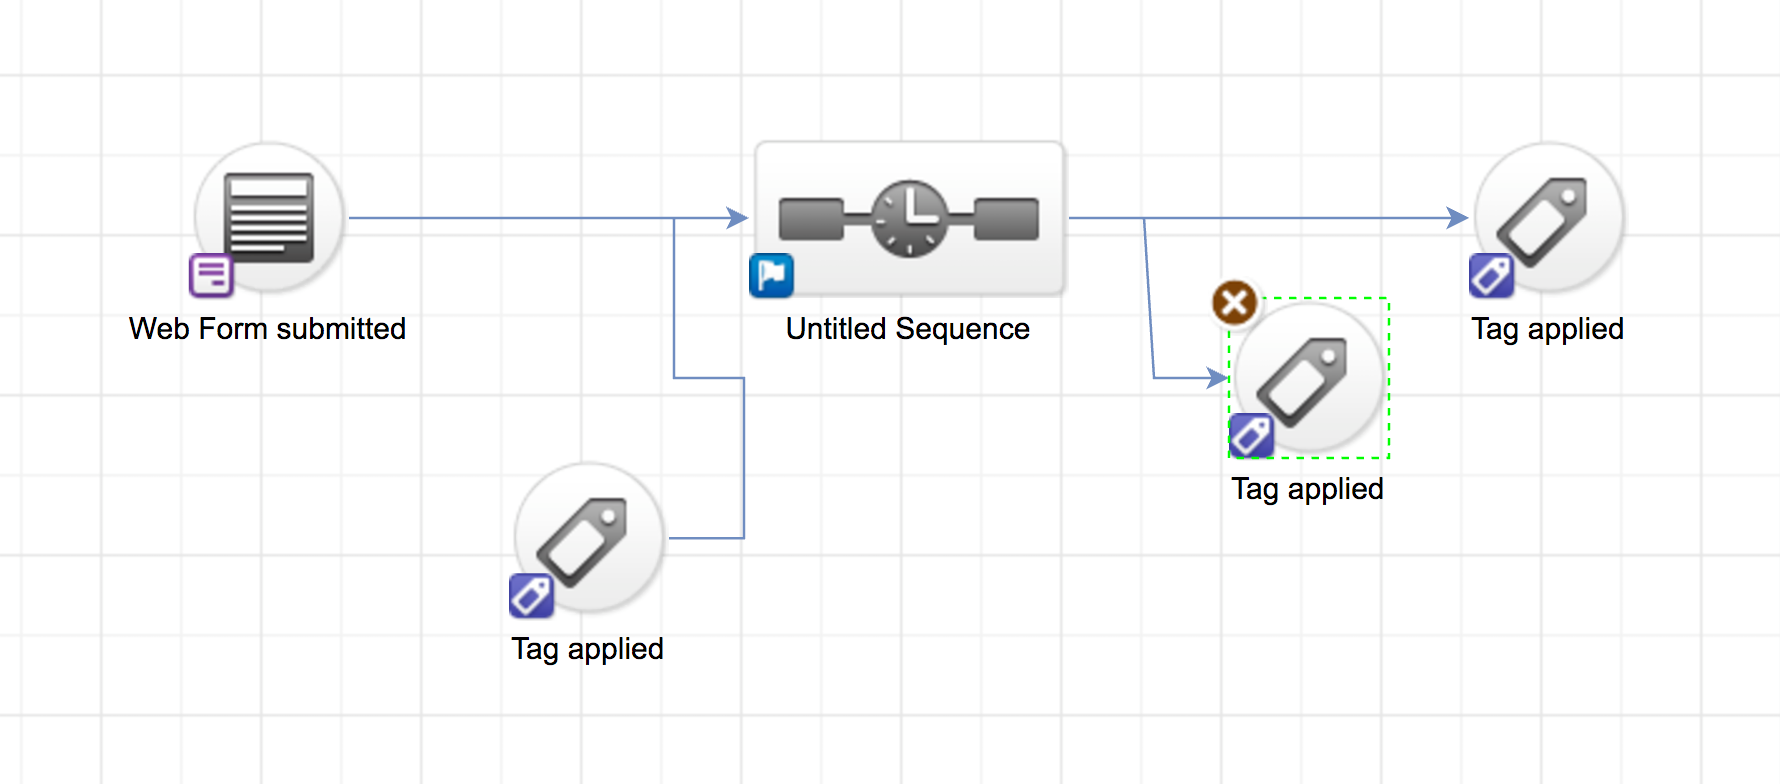
Not this:
This example is small, so it's not so apparent. But pay careful attention to the start and stop goals and their vertical alignment. You want your campaign to layout into three logical sections – a beginning (with start goals), a middle (with all of the logic and sequences and other intermediary goals if needed) and an end (with stop goals). The start goals (if you need more than one) should all align vertically and not cross into the middle section of the campaign. Likewise, the end goals should all align vertically and also not stray into the middle section of the campaign. Like this:
Now even for a much larger campaign, it still needs to adhere to this same Start – Middle – End structure. It will just have much more going on in the “middle” of the campaign, that's fine. But the overall structure remains consistent. This will dramatically impact the readability of your campaigns and how easily they are understood. So look again at my RFM example image below with the same Start – Middle – End structure applied to it.
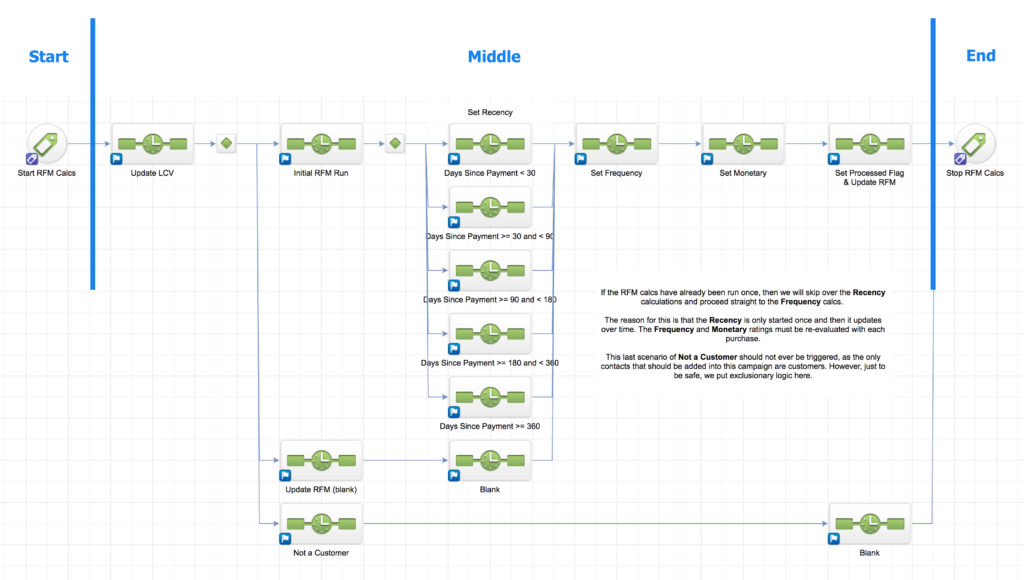
Yes, the “Middle” section of this campaign definitely has a lot more meat in it, but the layout is still the same – Start – Middle – End.
#2 – Grid Layout
Use one large square in the Infusionsoft grid (that's four of the little boxes) between each element. The exception to this is if you have a decision diamond in front of a sequence, then you use 2 large squares preceding it in the grid. This uniform spacing keeps everything easy to follow and logical. Look at the image of my RFM campaign above. You'll see the 1 box spacing used throughout, except in front of the decision diamonds where it's two boxes. You'll also see that it's all aligned on the grid both vertically and horizontally.
Look also at the “do” and “don't” images above and you'll see the same thing. See how the spacing and layout is consistent? It's super easy to follow.
#3 – Start at Upper Left
The first element (usually a tag goal or a webform goal) will be in the upper left hand corner – indented one square down and one square to the right.
Look at the image above and you'll see this illustrated. See how the START tag goal is located one large grid square down and one square to the right? This is the starting position for your campaign. It makes it very easy when you load/open your campaign that everything is always aligned to this corner.
NOTE: If your campaign doesn't align where you want it to, it's because you're shifting the canvas and not the elements on the canvas. To scroll the canvas you do a two-finger drag on the Mac (sorry guys, I don't use a PC, not sure what the method is there). To reposition the elements on the canvas, you need to select them all and then drag them to where you want them to be. I know this is a bit confusing and seems like I'm saying the same thing, but I'm not. Think of it as a table cloth on top of your table. You can pick up the plates and move them on the table cloth, or you can push the table cloth under all of the plates – same concept here.
#4 – Only Horizontal and Vertical
If you look closely at my RFM campaign, one thing you may not realize until you study it a little bit, is that there are no diagonal lines – every line is either vertical or horizontal. This is not an accident. When you create angled lines, they tend to overrun each other, overlap over sequences and generally create havoc. But if you look at the structure created in my RFM campaign, you'll see that everything flows logically from left to right with nothing overlapping or causing confusion.
Many people will argue with me on this one – and that's ok. I'm not saying that this is the only way you can do it, but it's the way I do it and it's the way I find to be most intuitive and easy to follow. Let me give you another example of one of my other RFM related campaigns to illustrate how this can be done.
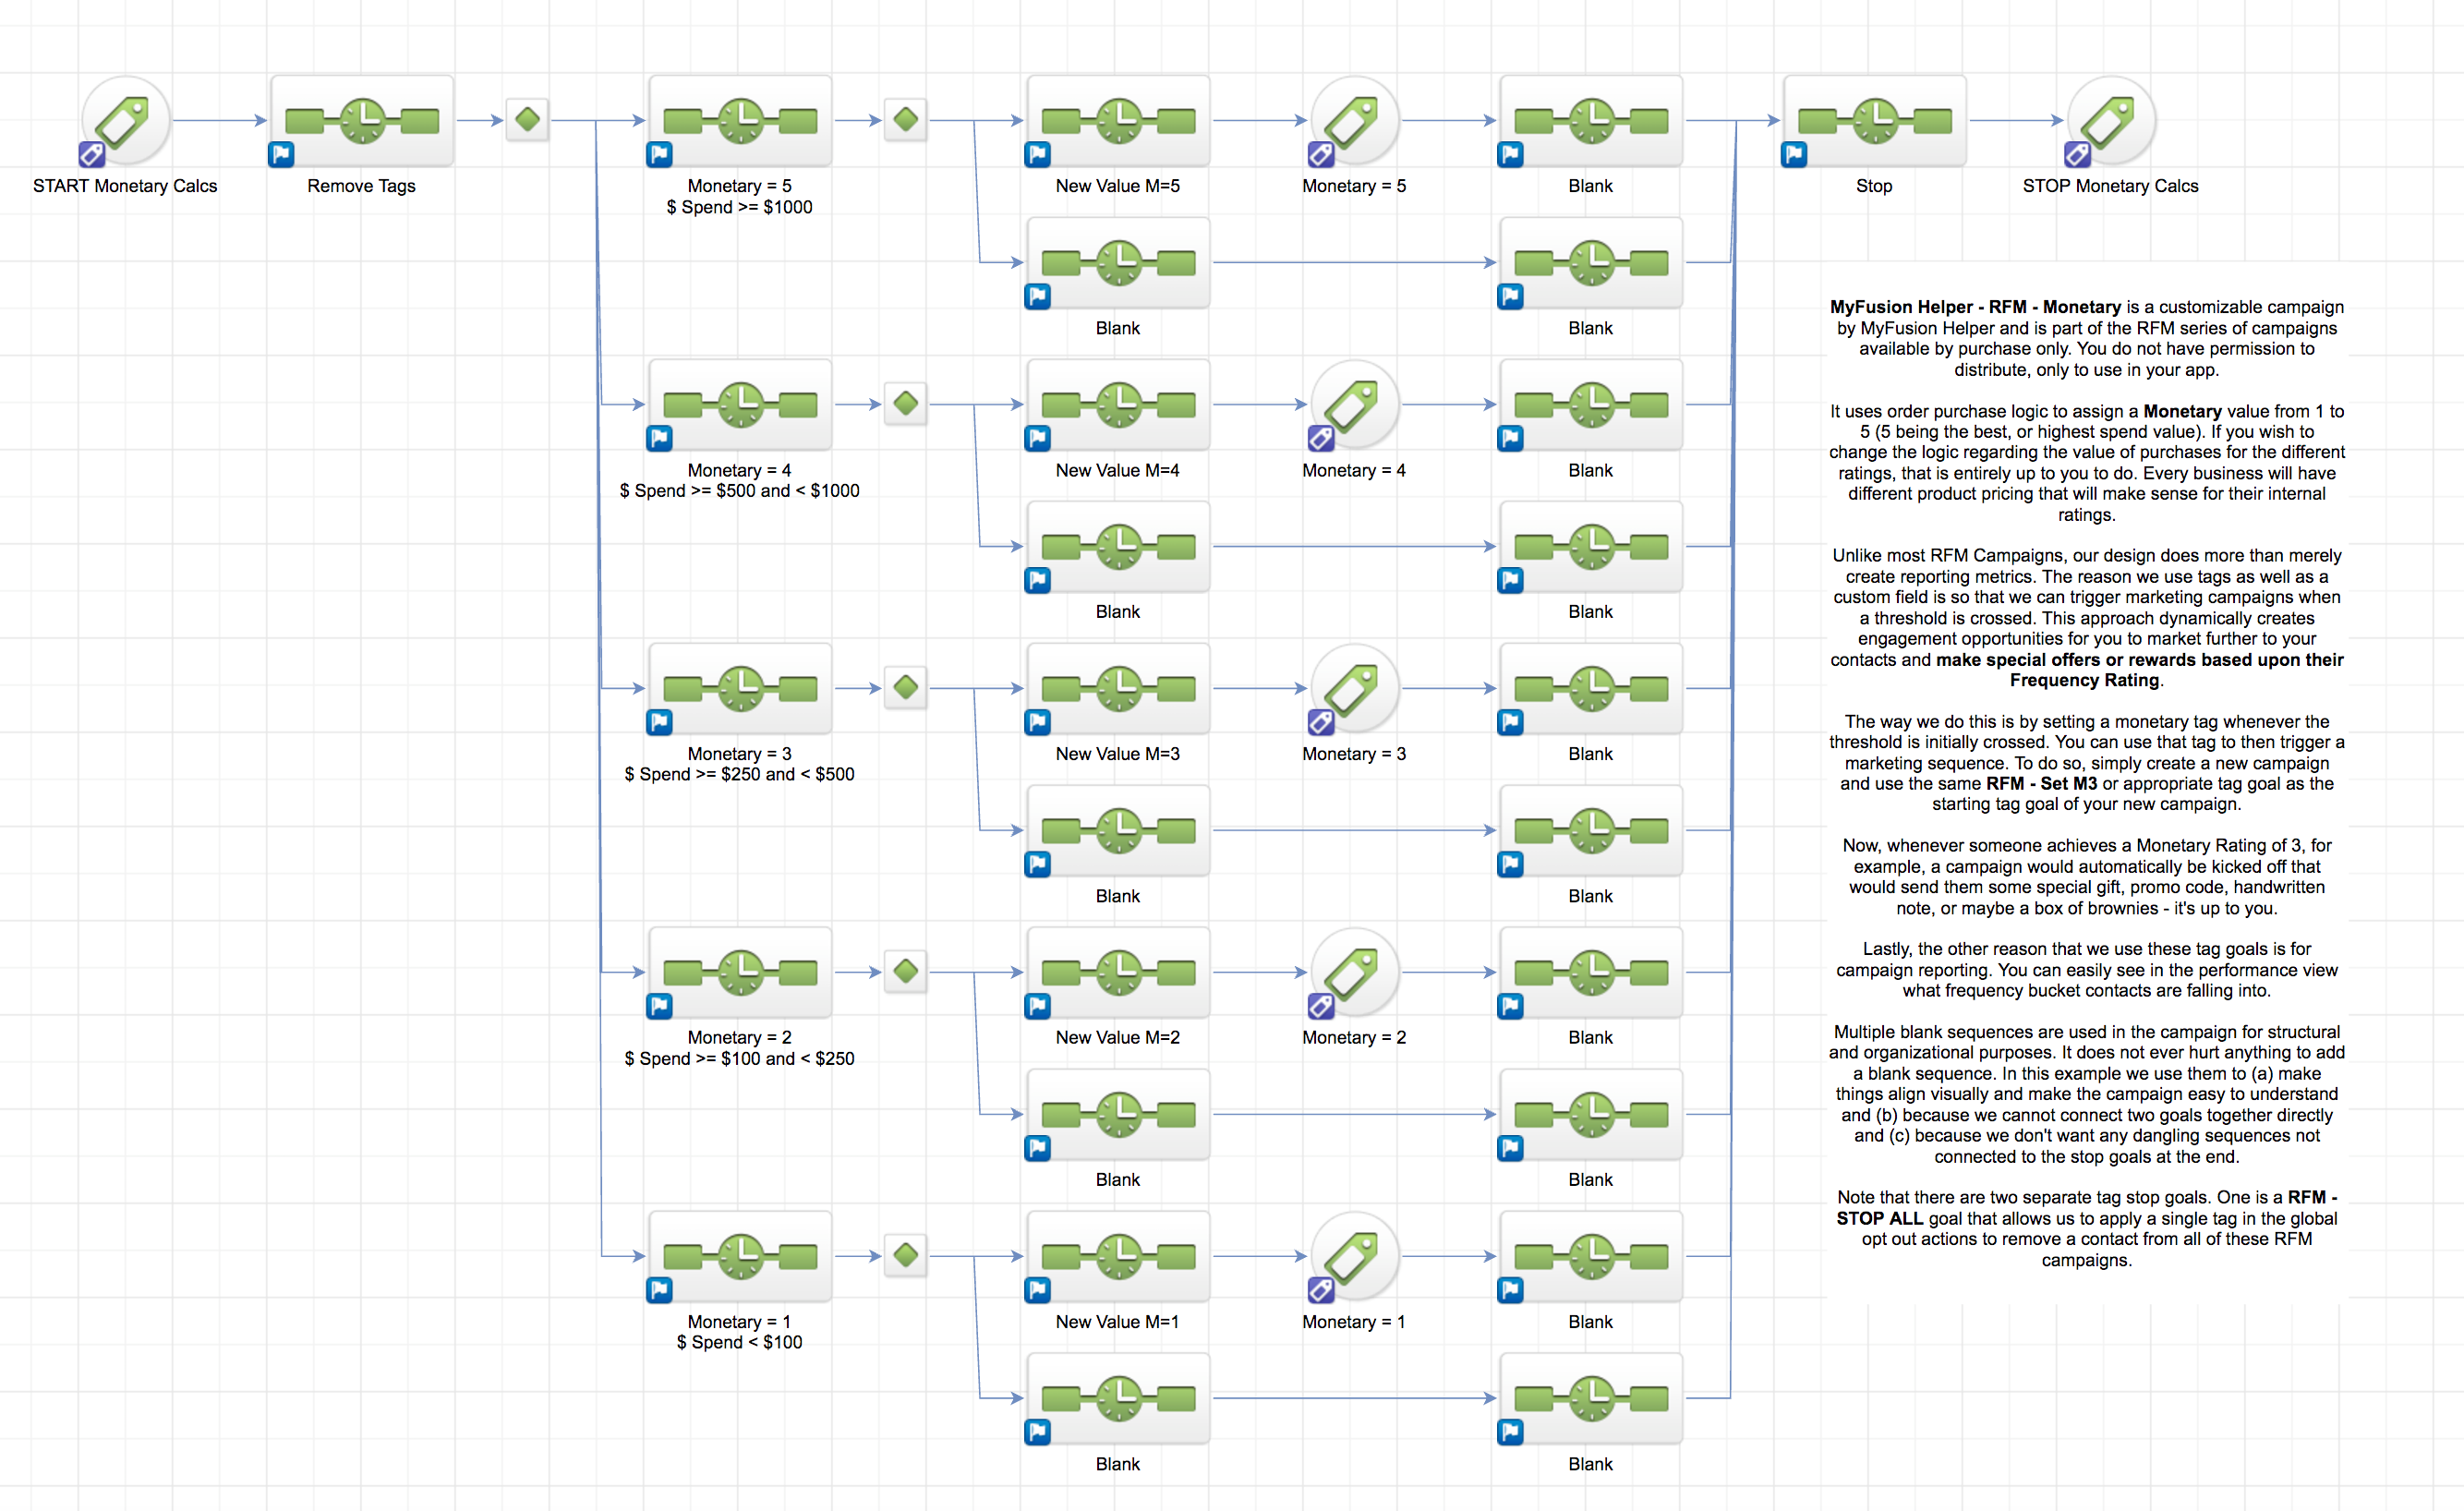
#5 – Use Blank Sequences
Now, in #4 above I tell you not to use diagonal lines and I use the illustration above to show you how you can do it. But I didn't tell you the “trick”. The trick to accomplishing this is by using blank sequences. Notice in the image above that I have quite a few of them in this campaign. I label them as “Blank” so that they are easily understood and their intent is clear.
A blank sequence does not have anything in it (should be self-explanatory – but just being thorough here) and has no impact on the flow of the logic at all. From a logic standpoint, it's as if it doesn't exist. You could think of it as if it were just a longer line connecting two areas of your campaign.
Blank sequences allow you to arrange and layout your campaign in a way that doesn't require diagonal lines that criss-cross over the top of other elements and confuse the layout and the logic. Now again, many people will argue with me on this and say that it adds a bunch of extra sequences that aren't necessary. But I would argue the opposite and feel that the end result is justified. It creates a very logical left-to-right flow within your campaign and eliminates criss-cross layout issues that can be hard to interpret.
#6 – Use Notes
Look at the RFM campaign examples above and you'll see that they both include detailed notes. This is part of a well-structured campaign. You need to explain how it is designed to work. Explain the logic and the flow of your campaign. Explain any of the dependencies. In many of my campaigns I'll also include a video link as well and just publish a video on YouTube in the unlisted mode and link it directly within the campaign note. This way your campaigns are self-documenting and easy to follow and maintain.
That's a Wrap!
Okay, that's it. Now, I am sure, in time, I'll come back and add some more rules in here of things that I perhaps do unconsciously in my structured process, but if you follow these simple rules, I can assure you that your campaigns will be much more easily understood and maintained over time. Enjoy! And be sure to let me know what you think in your comments below.